GMAX Tutorial - Texturing #2
By Milan Lisner mlk@volny.cz
www.mlk-airbase.wz.cz
.
Part 2 - Multiple part texturing ( aircraft wing ) - using normal texture

2.1 Preparing for texturing
.
In this lesson we will texture several parts together with one texture. It is useful e.g. for wing sub-assembly, which contains e.g. main wing, flap, aileron, slot, etc.
For example I chose wing from F/A-18 Hornet , which contains 10 objects. 
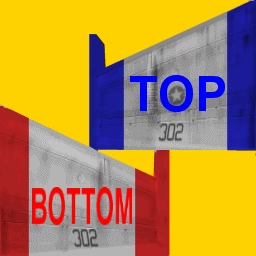
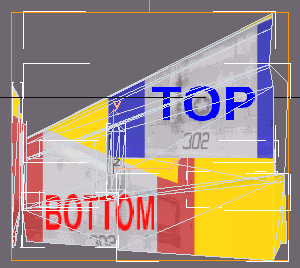
I prepared a texture, which isn't stretched like in Lesson #1 , but it has retained correct aspect ratio. 
We would like to texture top side of selected object with appropriate part of texture and then would like to texture opposite ( bottom ) side with another part of texture.
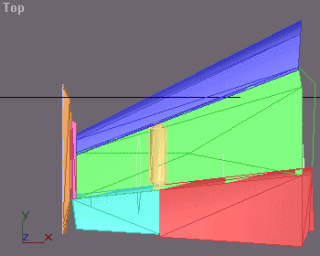
You can simplify the texture mapping, if you paint your texture similar to the image above.
This texture has the portion, we would like to assign e.g. on top side of the wing, positioned to one corner of the texture area. Why it will help us, you will understand below. 

NOTE: the techniques described below you use of course on only one selected object too.
TOP
2.2 Texture assigning
.
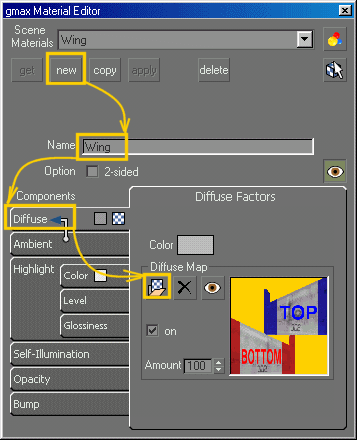
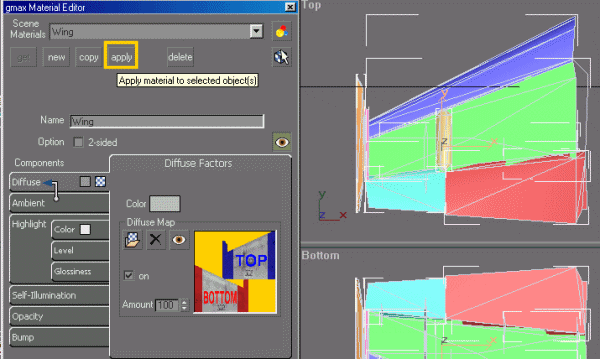
First we prepare new material with texture map.Click "Material Editor" icon  , click "New" and name your new material e.g. "Wing" ( this will help you to locate it by name in the future ). Then click "Assign texture" icon under Diffuse tab, and select desired BMP texture.
Then select all object, which you want to texture. You can select them e.g. by name - using "Select object" dialog box

You can also select these objects using crossing window. If there are more parts in one place, which we will not texture, use several crossing window selection with holding CTRL key ( to add object in selection set ) or ALT key ( to remove object from selection set ) .
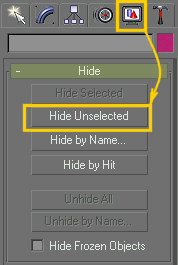
Once you have selected all desired object, I recomend to hide all unselected objects. You can do it under Display tab and by selecting "Hide unselected". This will help you to select all desired objects with one window selection in the future. 
If you want to see all your parts again, simply select "Unhide All" under the same Display tab.

TIP: you can lock you current selection using this icon on main status bar  ,
or using SPACEBAR key.
This icon turns in yellow  and then you can click anywhere in the viewport without affecting your current selection. If you want to unlock your selection, click its icon again .

Now we have selected all desired parts, so we can assign prepared material with our texture to them.
Click "Apply" button in Material Editor. This will apply your texture to all selected parts:

You probably don't see your texture yet, only the parts with changed color. This is because your parts doesn't know, how to apply the new texture. 
You can close the Material Editor and follow the next step.
TOP
2.3 Texture mapping - top of the wing
.
Keep all previous parts selected ( or select them again ).
If you have locked  your selection, you have still selected all desired parts.

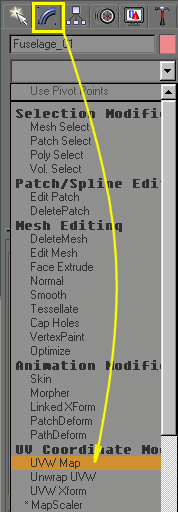
Then Select "Modify" tab on Command panel and select "UVW Map" from "Modifier list"
( you can find this function also in menu Modifiers > UV Coordinates > UVW Map )

Now you should see your texture on all selected parts, but it is not  positioned right.
We will correct it by editing UVW Mapping parameters.


If you look at "Parameters" rollout, you can see, that there is "Planar" mapping checked ( this is checked as default ). It seems appropriate for our wing assembly.
Look a bit below for "Alignment", for our wing example "Z" is suitable.
As you can see on image above, we need to stretch our texture a bit. 
Now is time to use quite handy tool - "Select and Manipulate" , so click this icon:

Maximize the TOP viewport using "W" shortcut or this icon: 
( use the same shortcut to return to previous four viewports view )
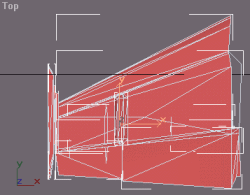
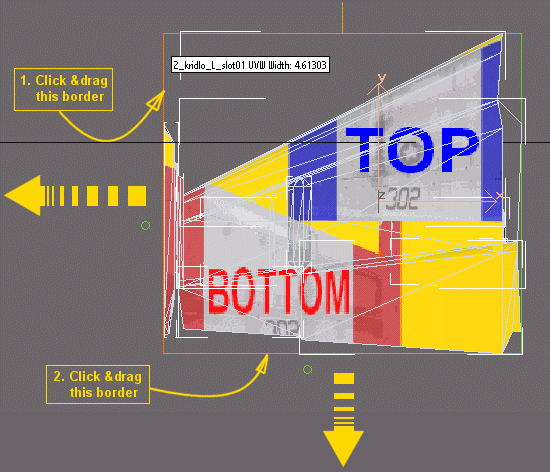
and move your view like the picture below, this will help us to see better, how our texture moves.

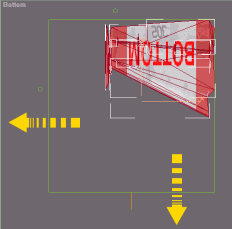
Now click on left green border and drag it left, until you see your texture correctly positioned.
Then repeat the same on bottom line of the green border.

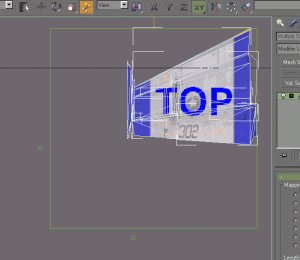
After this procedure you should see this result:
TOP
2.4 Texture mapping - botom of the wing
.
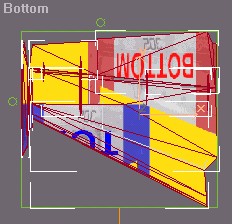
When you look at the bottom side of your wing, you will see the same texture, which is also mirrored.
We would like to texture bottom side with different portion of our texture.
We will use the same technique like in Lesson #1 , with one difference - now we will work with multiple selection of several objects.

In order to simplify the manipulation with UV coordinates, which we will add next, collapse all modifiers in modifier stack ( with all wing parts still selected ):
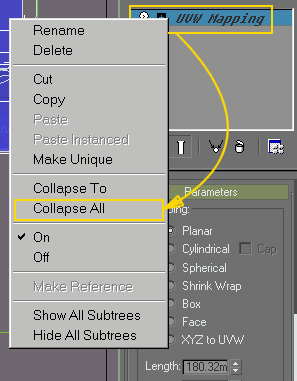
Right-click on line UVW Mapping in modifier stack and select Collapse All

NOTE: after doing this, you can't modify the previous mapping ( but the texture remains correctly mapped ), but don't worry - you can simply apply the UVW Mapping again, and correct something.


Also unlock your selection, if you have it still locked: 
... locked selection
... unlocked selection
Now we would like to select only polygons on bottom side.

Switch your current viewport to BOTTOM view. Hit "B" shortcut or right-click on text ( upper left corner ) in desired viewport and select View > Bottom :

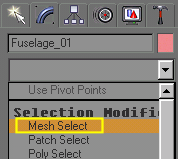
Now apply modifier "Mesh select" on all selected wing parts, 
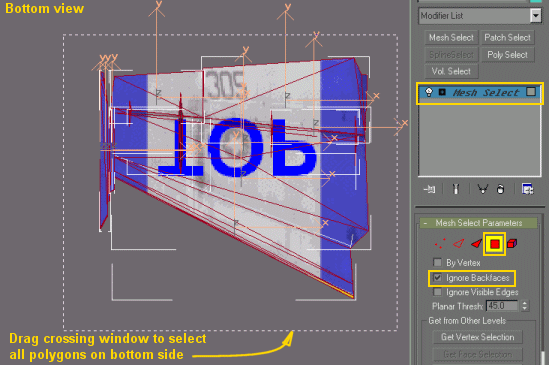
and turn on "Polygon" sub-object mode

Then check checkbox "Ignore backfaces" and drag crossing window around all selected parts:


Now, while you have selected desired polygons, apply "UVW Map" from Modifier list again and do similar steps like we did on top side. 
We use "Planar" Mapping and "Z" Alignment:

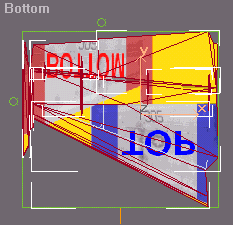
You see, that we need flip texture from left ro right. Do it by flipping the "U Tile" under UVW Map parameters rollout:

Now it looks better:

Then use "Select & Manipulate" tool  and drag appropriate borders to strech your texture to desired position.

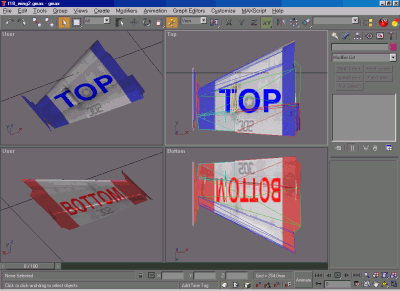
Now you should have your wings correctly textured:
TOP
Gmax Texturing Tutorial #3